Please check to make sure you have all parts. You should have 4 flaps with an etched number matching the number at the top left of these instructions, and 1 hardware bag labeled with the same number. There is a parts list at the end of these instructions to compare all your parts against.
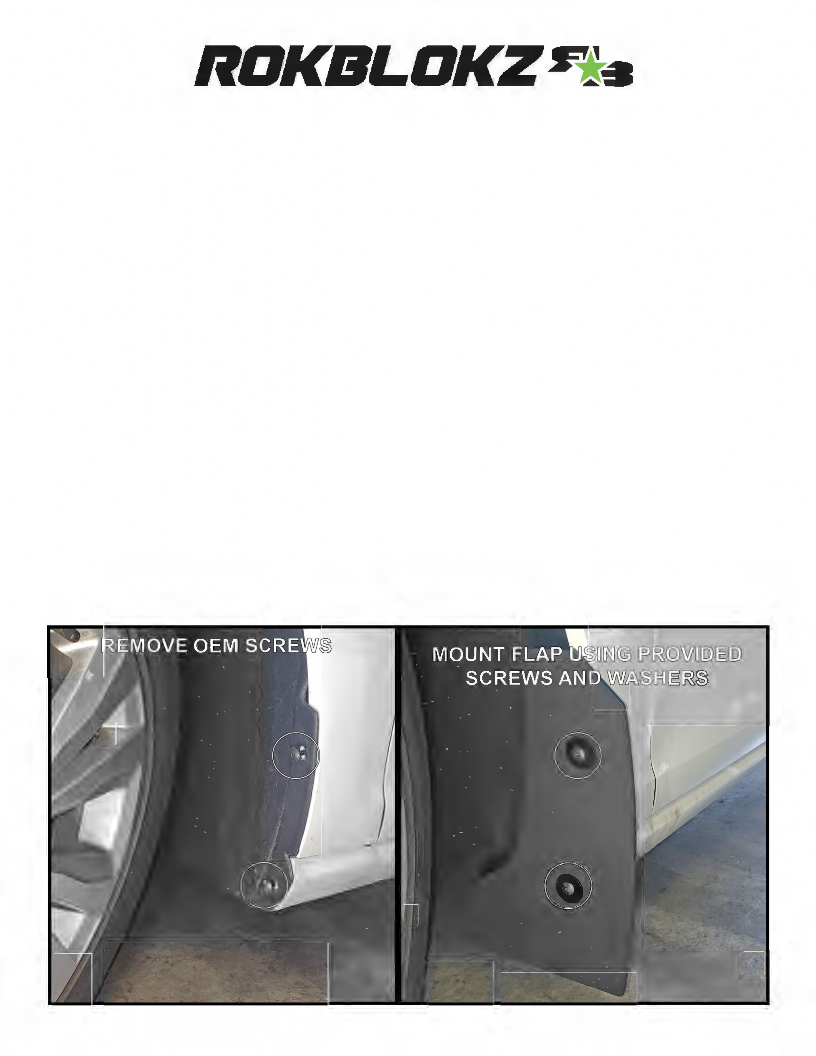
Begin by removing the 2 OEM screws that are holding the fender-liner in place.
Loosely mount the mud flap using an included screw with washer for each of the outer/edge mounting points.
Align the mud flaps using the bottom edge of the flaps as a reference for being square with the car. Once you have them aligned to your liking, fully tighten the screws until snug.
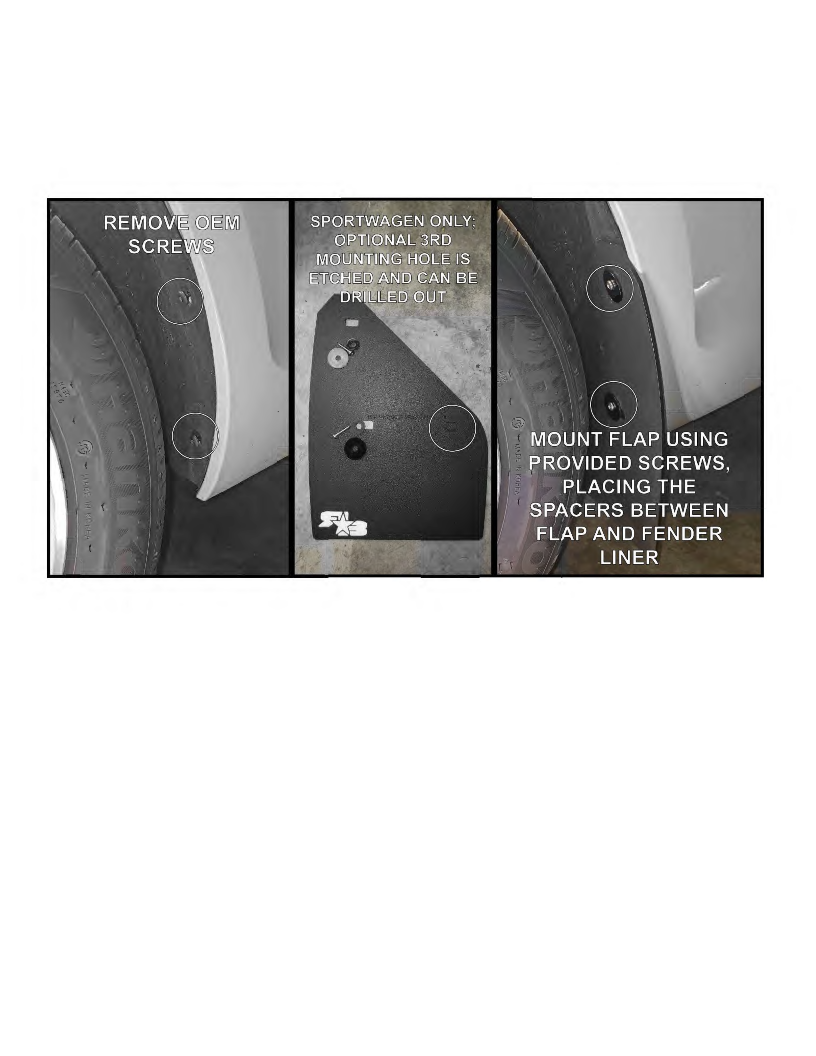
REAR- See Pictures for reference.
Begin by removing the 2 OEM screws that are holding the fender-liner in place.
Loosely mount the mud flap using an included screw with washer for each of the outer/edge mounting points. Place a 5mm spacer over each of the edge screws between the flap and the fender-liner.
Align the mud flaps using the bottom edge of the flaps as a reference for being square with the car. Once you have them aligned to your liking, fully tighten the screws until snug.
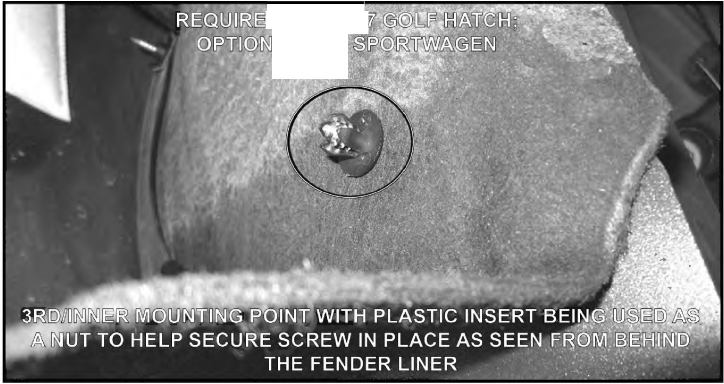
MK7 Golf Hatch: For the remaining (inner) hole, thread the thicker screw with washer into the fender liner through the inner mounting hole in the mud flap. Once the screw begins protruding through the back side of the fender liner, place the small nylon insert over the screw with the flat side towards the fender liner to act as a nut for the screw. You may need to hold it in place with some pliers until the screw is fully tightened. (This step is Optional on the SPORTWAGEN. To use this mounting point you would begin by drilling out the etched hole with a ¼” drill bit.)
© W@ [Ml
[L @
INCLUDED PARTS LIST
*OEM (Original Equipment Manufacturer) refers to the stock or factory hardware
FRONT:
4x 1.25” Black Fender Washers - (H100)
4x #10 1.25” Screws - (H043)
2x Front Flaps
REAR:
6x 1.25” Black Fender Washers - (H100)
4x #10 1.25” Screws – (H043)
2x #14 1” Screws – (H052)
4x 5mm Nylon Spacers – (H086)
2x Small Nylon Inserts – (H028)
2x Rear Flaps